AltiumLive Dashboard - Managing Groups
Contents
Parent article: AltiumLive - Dashboard
Main page for managing groups within the Dashboard.
The Groups page is part of the Alitum Dashboard. Use this page to manage groups for your account. Groups allow you to further organize your users according to, for example, the particular section of the organization in which they are involved, or the design team they are in. Groups also make allocation of licenses more streamlined.
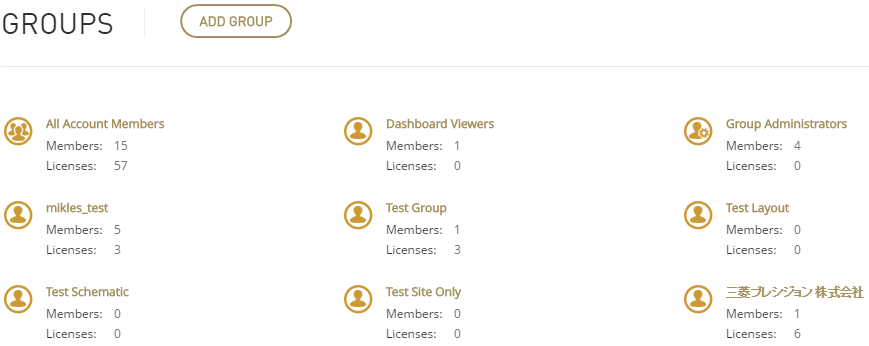
Top-Level Listing of Groups
The page presents a top-level listing of all groups for the account - system and user-created. Each group in the list is displayed in terms of:
- Group Name
- Current number of members (users)
- Current number of allocated licenses.
System Groups
There are two system groups, defined by default for an account. These are:
- All Account Members - this group automatically includes every user in the account. So if a license is allocated to this group, then any user in the account can use that license.
- Group Administrators - this group gives administrative privileges to the members of the group. Anyone who is a member of this group has access to, and the ability to make changes within, the Dashboard.
Becoming a Group Administrator
A user is an administrator for the account if they are added as a member to the Group Administrators group. Admission to this group occurs in two ways:
- When a new license is purchased for the account, the Notification Contact for that license is added automatically to the group.
- A user can be manually added to the group by another account administrator. In other words, a member of the Group Administrators group has the power to bestow administrator powers to another user, simply by making them a member of this group.
Creating a New Group
To create a new group for the account, simply click on the Add Group button, located at the top-left of the page. The detailed Group Management page will appear. To define the group:
- Use the Group Name field to enter a meaningful name for the new group. For example this may be a name that is reflective of the task performed by its members. This is a required field, as denoted by the red asterisk.
- The Members region of the page is where you define the members of the group - its constituent users. This can be done as part of creating the group, or by editing the group afterward, as required. To add a user as a member of the group, simply click inside the associated field and start typing the username (First Name Last Name) or email address for that user. As you type, a drop-down list will automatically and dynamically populate with matching results, based on active users in the current account - click the required user.
- Continue adding further users in this manner. If you need to remove a user from the field, simply click the small cross at the right of the box containing that user's name. Once all users have been entered as required, click the Add button. The new group will be added to the account.
- Once the group is added to the account, you can allocate licenses to it.
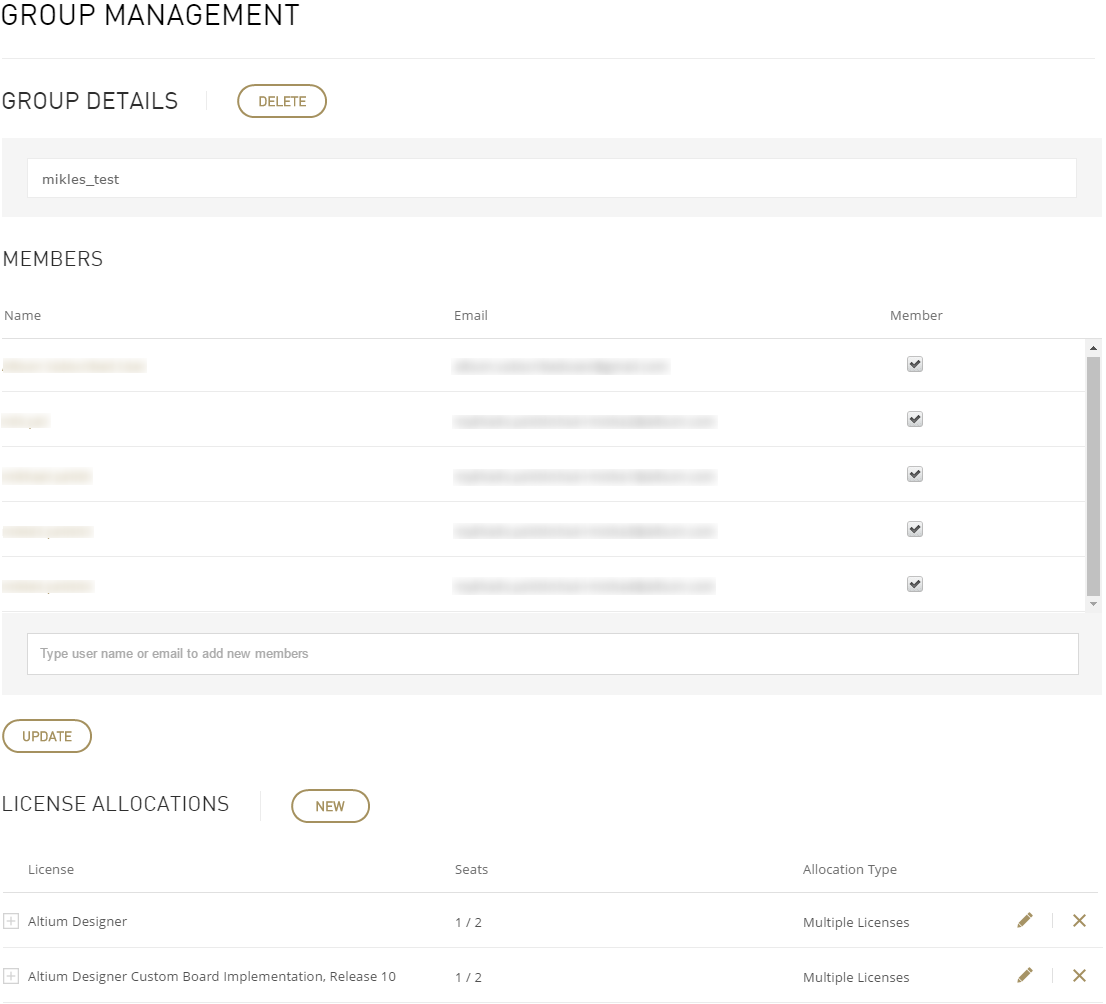
An example Group defined for an account, with license allocations.
Allocating a License to a Group
Once a new group is added to the account, you can proceed to allocate one or more licenses to it, for use by its member users. Both On-Demand and Standalone type licenses can be allocated (targeted) for use by specific groups within the account. This allows you to control exactly who has access to, and use of, your licenses. For a multi-seat On-Demand license, you can assign seats across one or more defined groups. This provides global floating license capability - within the geographic scope of your license and the conditions set out in the EULA - without needing to implement your own server.
By default, when an On-Demand or Standalone license is created by Altium for your account, that license (and all of its seats for a multi-seat On-Demand license) will be allocated to the system group All Account Members. Reallocate the license as required.
From the Group Management page, allocation of licenses is performed from within the License Allocations region.
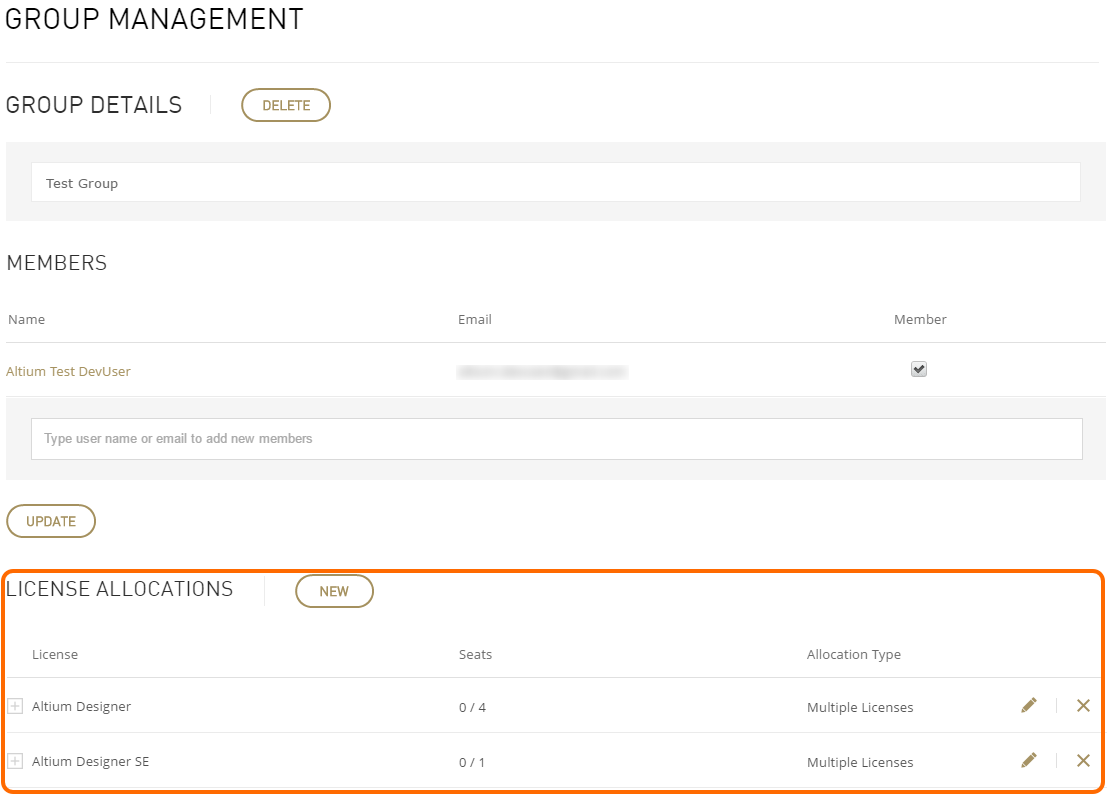
Controls for allocating licenses for use by members of the parent group.
To allocate a license, simply click the New button. In the Create Assignment pop-up window that appears, use the Product Name and License fields to choose the license you wish to allocate to the group. The drop-down lists are populated with all product licensing, and On-Demand and Standalone licenses thereof.
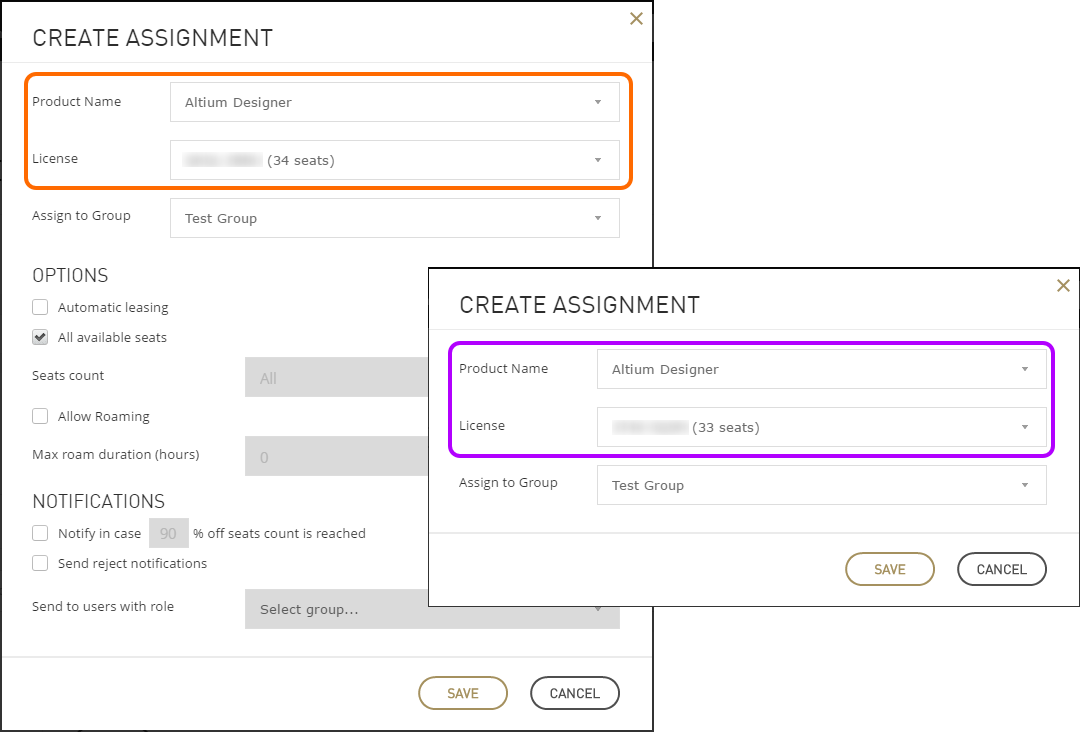
Allocating a license to the group for an On-Demand license (back) and Standalone license (front).
When allocating an On-Demand license, a number of additional options are available in the Create Assignment window:
- Automatic leasing - forces Altium Designer to automatically lease (use) this license when it becomes available. In Altium Designer's License Manager (DXP » My Account), the normal process of choosing the license from the list and selecting Use is performed automatically, for this license.
- Seat availability - use the Seats count field to specify the number of license seats (up to its total seats rating) that will be made available to the specified Group, or simply check the All available seats option to assign the total number of seats for the license.
- Roaming - allow a license to be 'roamed' (used by Altium Designer when its host PC is not connected to the network) by selecting the Allow Roaming option. The Max roam duration setting will configure the license to disable a 'roamed' seat after the nominated period. See Using an On-Demand License for more information about license Roaming.
- Notifications - notifications are messages that will be sent to Users in response to specific events, such as when almost all of the assigned license seats have been leased. Specify the % level at which a notification will be sent (this will be sent to all members of the Group(s) to which the license is allocated). Select the Send reject notifications option and optionally nominate a target Group to enable alert messages for Users that have been disconnected from the assigned license (seat revoked).
When the new license allocation configuration is complete, click Save to commit the allocation to the Group.
License Allocation Type
Once a license has been allocated to the group, you will notice that it has an Allocation Type - reported in the summary License Allocations section. This can be either Single License or Multiple Licenses.
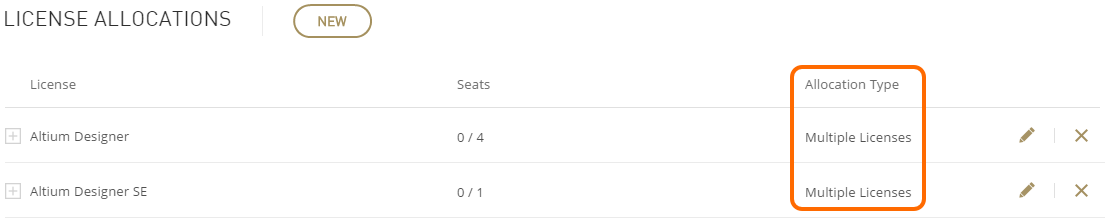
Licenses that has been allocated to a group, and an indication of the Allocation Type.
Multi-assignment is a feature that is specific to On-Demand licensing. Performed from the Group Management page - for the group to which you wish to assign licenses - it gives you the ability to quickly create license assignment for that group, by license name.
Once you have assigned a specific license to a group, you can edit that assignment from the Group Management page, by clicking the associated ![]() button, accessing the Edit Assignment pop-up window. In the License field, select the All on-demand entry from the drop-down listing. After making any additional changes and saving, all licenses associated to the account that have the same Product Name will be automatically allocated to that group, and are used to provide the licensing in accordance with the defined licensing options. The Allocation Type will change from Single License to Multiple Licenses, and those licenses will be listed under a single top-level entry for that license name.
button, accessing the Edit Assignment pop-up window. In the License field, select the All on-demand entry from the drop-down listing. After making any additional changes and saving, all licenses associated to the account that have the same Product Name will be automatically allocated to that group, and are used to provide the licensing in accordance with the defined licensing options. The Allocation Type will change from Single License to Multiple Licenses, and those licenses will be listed under a single top-level entry for that license name.

Quickly allocating multiple licenses of the same name to a group defined for the account.