Enhanced Customization of Schematic Ports
Contents
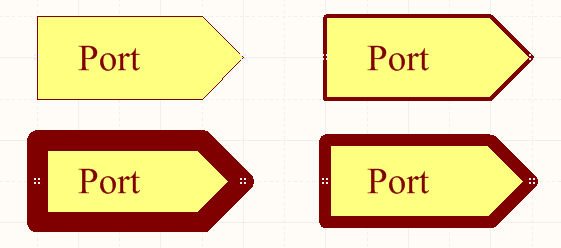
Customization of port objects is taken to a whole new level in Altium Designer 13.0. You now have the ability to control the height of the port and its border width. In addition, the font used for the port name can be specified at the individual port-level. Throw-in auto-sizing capability and the result is a very versatile, empowered port object, available in your design arsenal.
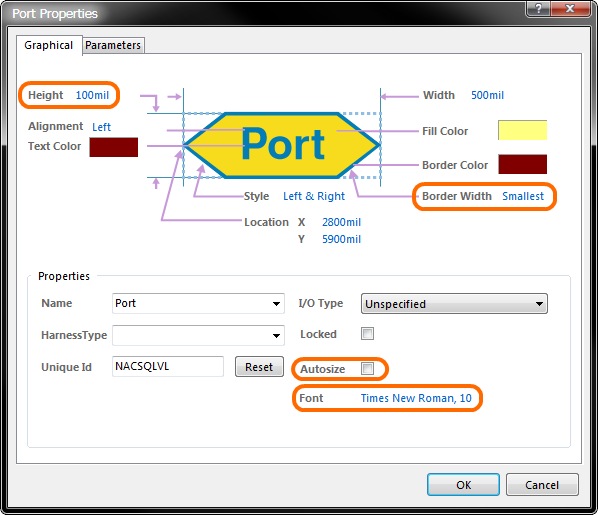
Height
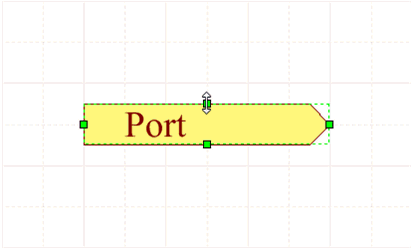
After placing a port on a schematic sheet, its height can be manually modified. This can be performed either graphically, or non-graphically. Graphical manipulation of the port's height is performed using the vertical editing handles, available when the port is selected in the design workspace.
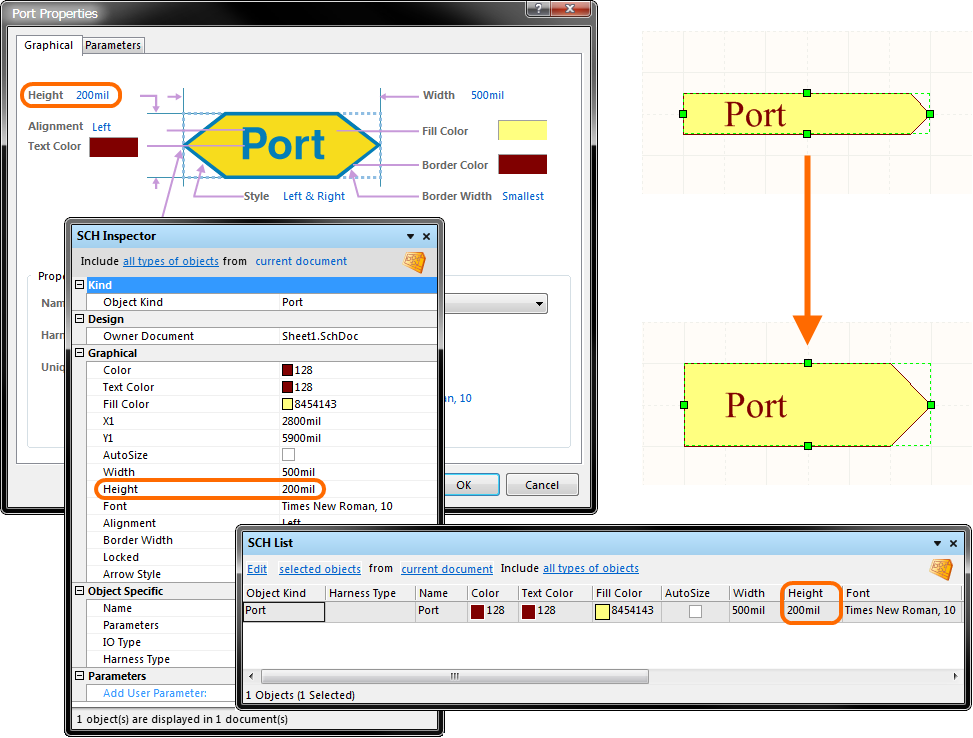
Non-graphical editing is performed either from the Port Properties dialog, or from the SCH Inspector or SCH List panels. In each case, simply enter the required new value into the Height field.
Border Width
Use the port's Border Width property to control the thickness of the port's border. Choose from Smallest (default), Small, Medium, or Large.
Font
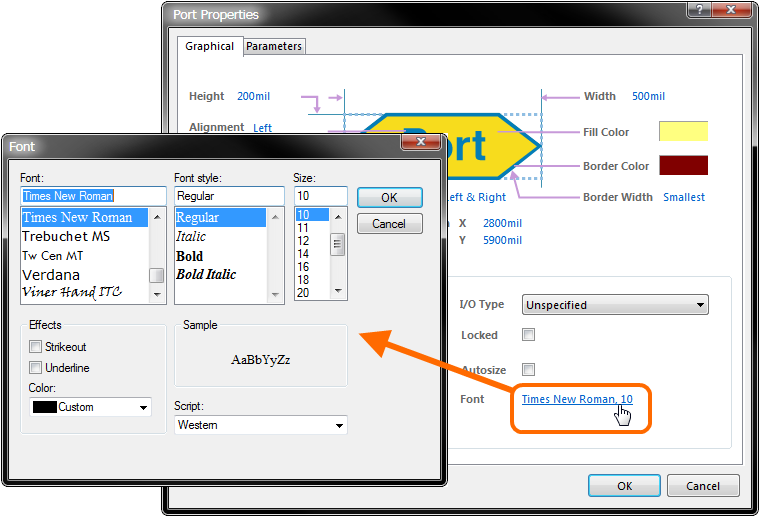
By default, the font used for the port's Name follows the global document-level font, set on the Sheet Options tab of the Document Options dialog (Design » Document Options). This can be overridden at the individual port-level, allowing you to fully control the textual presentation of ports as needed.
To change the font, simply click the control to the right of the Font label, in the Port Properties dialog. This will give you access to the standard Font dialog, from where you can make changes to the font used, and its associated properties (style, size, color and effects). The control doubles as a notification for the font currently chosen, or 'in-force'.
Autosize
Doing things manually typically means having to expend additional effort. Of course, this gives you full control, but if an automated process can be put in place that is both fast and effective, its use can be of great benefit. With the port design object, automation of port size can certainly have a positive impact on productivity.
To take advantage of the autosizing feature, enable the port's Autosize option. This can be done in either the Port Properties dialog, or the SCH Inspector or SCH List panels.
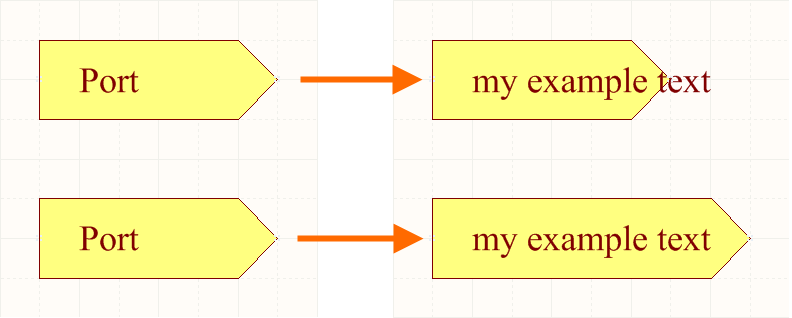
the port is automatically resized to accommodate the length of the new text.
And if you change font size, the autosize feature's got you covered. The height of the port will simply be resized to accommodate the text accordingly.
resize to fit the new text size.
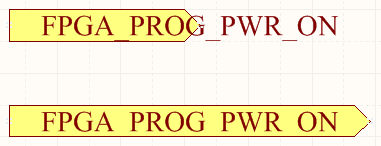
The autosize feature proves invaluable when picking up existing text for the port name from elsewhere on the sheet, using the inheritance feature. Simply ensure the Autosize option is enabled (either by setting the default settings for the port object as part of preferences, or on-the-fly using the Tab key to access the Port Properties dialog). Then launch the command to place a port, hover the cursor – with port attached – over the text required (a net label for example), and press the Insert key. The port will not only inherit the text, but resize to accommodate the length/height of that text.
The following image shows text inheritance in action, and the resulting port, resized accordingly, courtesy of the Autosize feature.

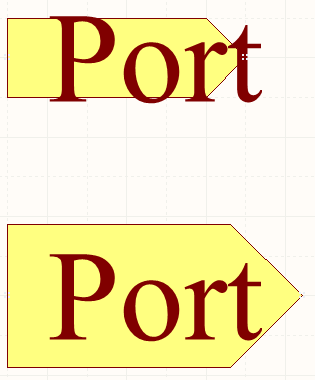
The next image shows the results of text inheritance for the port name, with the Autosize option disabled (top) and enabled (bottom). The time saved not having to manually resize each port cannot be overstated!