Contents
Dispensing with command-based project creation, Altium Designer 14.3 provides a dialog-based means of creating a new design project. The facilitator of this - the New Project dialog - can be accessed in the following ways:
- Using the File » New » Project command.
- From the New From Template region of the Files panel. Simply click on any of the project entries to access the dialog.

The New Project dialog - your central console for creating any new project in Altium Designer.
Choosing a Project
As you would expect, the New Project dialog caters for any of the project types supported by Altium Designer. Use the Project Types listing to choose the type of project to be created.
The Project Templates region of the dialog populates with a listing of all currently defined templates, of the chosen project type, found in the specified Template Location. This is the location defined on the Data Management - Templates tab of the Preferences dialog (C:\Users\Public\Documents\Altium\AD14\Templates for a default installation).
Choose to create a new project based on a specific existing template, by selecting that template in the list. If the template has an associated image file, a preview will be displayed in the area to the right of the list.
Choose the <Default> template entry to create an empty shell project of the chosen type, with no source documents added.
Project Naming
Use the Name field to specify the required name for the new project. By default, names used are based on the project types themselves:
- PCB Project - default name is PCB_Project.
- FPGA Project - default name is FPGA_Project.
- Core Project - default name is Core_Project.
- Embedded Project - default name is Embedded_Project.
- Integrated Library - default name is Integrated_Library.
- Script Project - default name is Script_Project.
If basing the new project on an existing project template, and that template defines associated source documents, copies of those documents will be created. For example, consider creating a new PCB project based on the template AT long bus (13.3 x 4.5 inches).PrjPcb, which has associated documents AT long bus (13.3 x 4.5 inches).SchDoc, and AT long bus (13.3 x 4.5 inches).PcbDoc. With the Name field left at its default (PCB_Project) the result will be:
- Project name: PCB_Project.PcbPrj.
- Schematic source document name: AT long bus (13.3 x 4.5 inches).SchDoc.
- PCB source document name: AT long bus (13.3 x 4.5 inches).PcbDoc.
Project Location
Specify where to create the project using the Location field. Either enter the path directly, or click the Browse Location button to access the Browse for project location dialog, in which to browse for the required storage folder as required (or create one on-the-fly).
Adding the Project to Version Control
A new project can be added to a connected Design Repository and checked out as part of its creation. To do this, simply enable the Add Project to Version Control option. The Repository field will become available. Use this to choose the target Design Repository in which to add the project.
With the target Design Repository chosen, the Location field is used to specify the path to the local working directory - the folder into which a working copy of the project will be checked out to. By default, the Location field will populate with the Default Checkout Path defined as part of the properties for the chosen Design Repository. Change this to another working folder location as required.
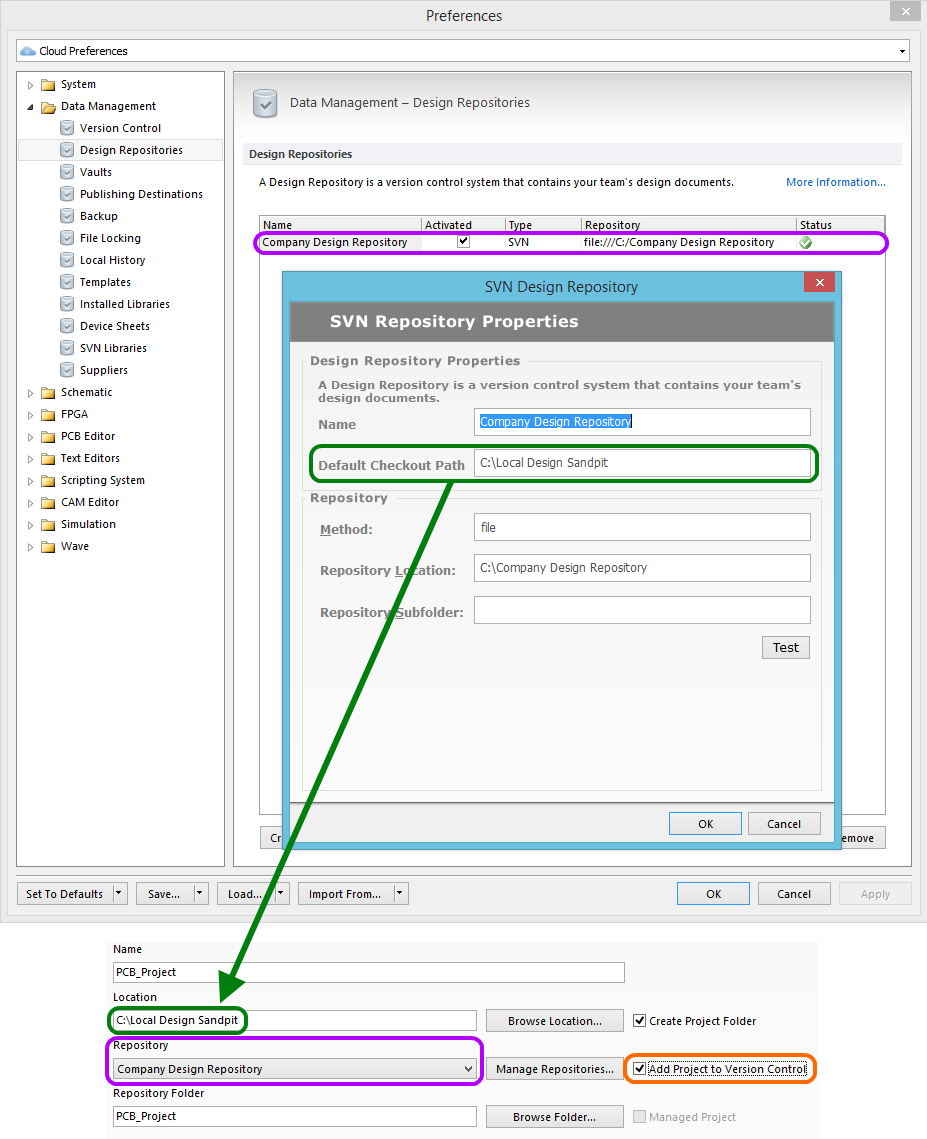
When adding to version control, the local working folder is taken from the Default Checkout Path for the chosen Design Repository.
Use the Repository Folder field to specify a folder within the repository in which to create the project (and subsequently check out content from). By default, a folder will be created in the repository using the entry specified in the Name field. You can change this directly by typing the required folder name into the field. Alternatively, click the Browse Folder button to access the Add To Version Control dialog. The proposed new folder will be presented, and has a dimmed folder icon to indicate it has yet to be created. You can browse for an existing folder, create a new one on-the-fly, or change the name of this proposed folder.
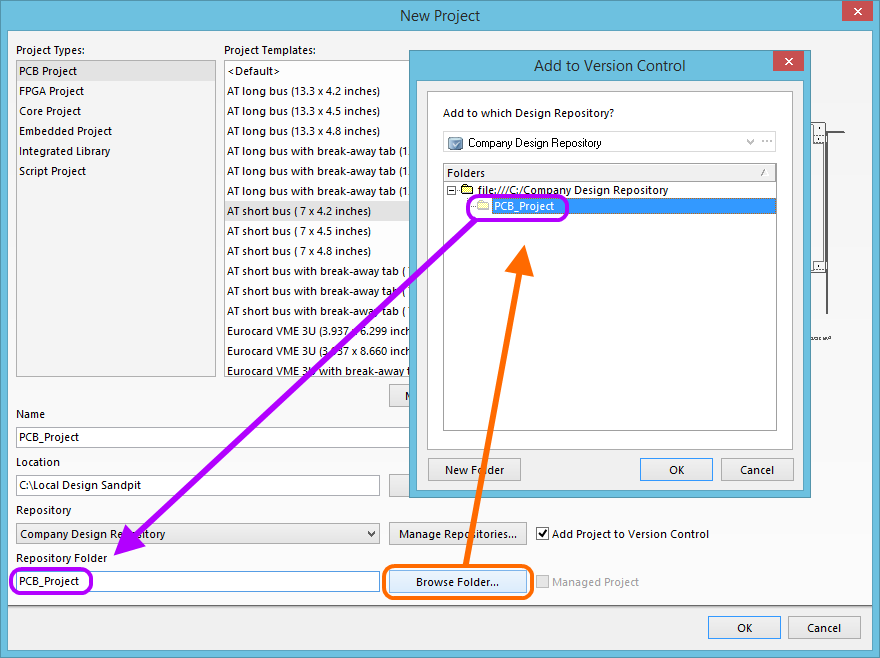
Specify a folder within the Design Repository, in which to create the project.
On creation, the project (and associated source files if applicable) will be added to the specified folder within the target Design Repository, then checked out to the local working folder. The project will be opened in the Projects panel. Note that at this stage, the project is added to the Design Repository, but still needs to be fully commited, as indicated by the blue crosses in the VCS Status column of the panel.
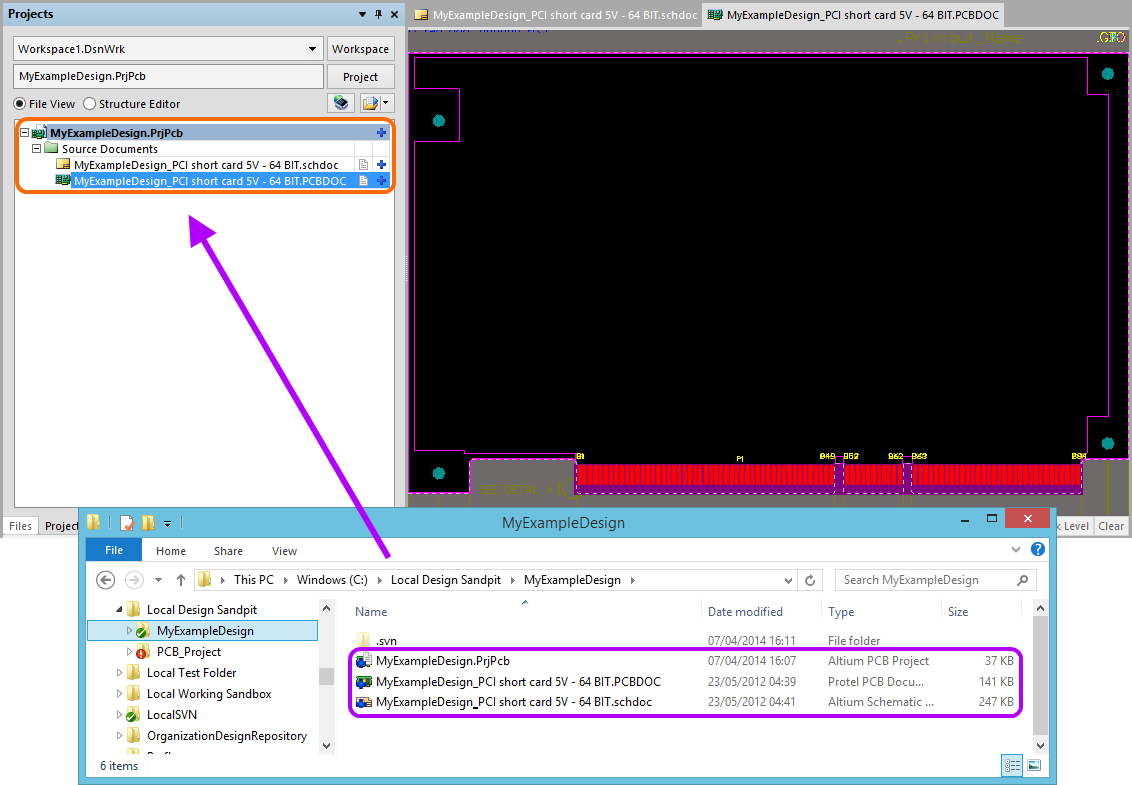
The new project is added to the Design Repository, checked out and opened in Altium Designer. You just need to complete the loop by commiting the project and its documents (where applicable) to the repository.
Managed Projects
Enable the Managed Project option to have the new project created and stored in the Design Repository set up for your enterprise environment. Specification of Repository and Repository Folder is similar to that when adding a project to version control. The only difference being that a managed project is stored within a repository provided as a service through the enterprise platform - as part of your Altium Vault installation.